Git is baked right into Visual Studio Code, making version control feel like second nature. From staging and committing changes to handling merges and pushing to remote repositories, the built-in UI provides a smooth, visual workflow. Let’s explore how to leverage these features—plus a few extras like Git blame, GitHub integration, and interactive rebase—to keep your code pristine and your team happy.
Basic Git Operations
At the heart of Visual Studio Code’s source control is the Source Control panel (the icon that looks like a branch fork on the Activity Bar). Once opened, you’ll see the changes in your working tree, including any staged and un-staged files. Here’s the lowdown on each operation:
- Staging: Click the plus icon next to changed files, or use the
Stage Changesbutton for everything at once. - Committing: Enter a commit message in the text box at the top of the Source Control panel, then hit the checkmark to commit.
- Pushing & Pulling: Once you’ve committed, push your changes to the remote repository by clicking the triple-dot menu (
…) and selectingPush, or use the Command Palette (Ctrl+Shift+P/Cmd+Shift+P) and typeGit: Push. Pulling follows a similar workflow (Git: Pull). - Branching: Use the branch indicator in the bottom status bar. Clicking it displays your current branch and offers options like
Create Branch,Checkout Branch, andDelete Branch. - Merging: Switch to the branch you want to merge into, then from the Source Control menu or Command Palette, select
Git: Merge Branchto bring in changes from another branch.
If you prefer the terminal, everything is still at your fingertips (git add, git commit, etc.). Visual Studio Code’s integrated terminal can provide a nice blend of command-line control and visual feedback in the Source Control panel.
Diff View
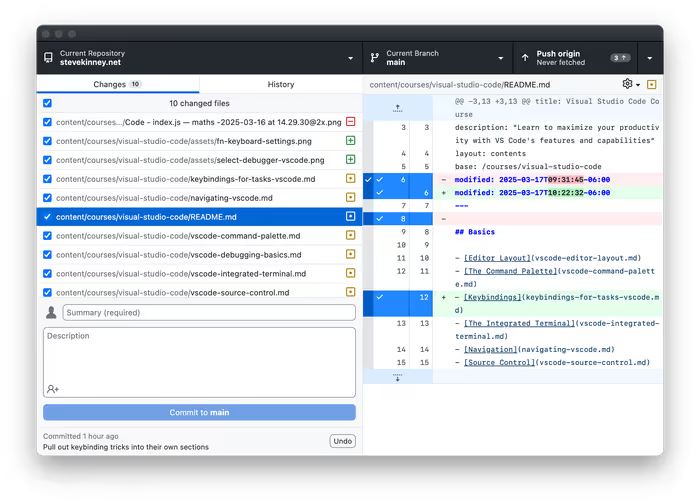
Comparing code changes is a breeze with Visual Studio Code’s diff viewer. When you click on a modified file in the Source Control panel, you’ll see a split view showing the old content on one side and new changes on the other. Additions appear in green, deletions in red. This helps you quickly review edits before committing, ensuring you don’t accidentally introduce that half-finished debugging hack.
You can diff any two files (even if they aren’t in the same repository) by right-clicking a file in the Explorer and choosing Select for Compare, then right-clicking another file and selecting Compare with Selected.
Merge Conflict Resolution
Git merges can get hairy, but Visual Studio Code’s merge conflict resolution tool is there to save the day. Whenever a merge conflict arises, conflicting sections in files are highlighted in the editor with clear options:
- Accept Current Change keeps your local modifications.
- Accept Incoming Change takes changes from the branch you’re merging in.
- Accept Both Changes merges them together. (Use with caution if they’re truly conflicting!)
- Compare Changes opens a diff to help you decide what to keep.
Once you resolve each conflict, save the file, and stage the changes. Visual Studio Code will mark the conflict as resolved, letting you wrap up the merge gracefully.
Git History
To browse commit history, use extensions like Git History or built-in commands. Even without an extension, you can right-click a file and select Timeline to see recent commits. Additionally, you can open the Command Palette and type Git: View File History (if you’ve installed an extension providing that feature). Each commit in the history shows details like commit message, author, and date, and you can drill down to view diffs for that commit.
Git Blame
Ever wonder who wrote that questionable piece of code? Git blame has you covered. In Visual Studio Code, you can hover your cursor over a line or install an extension like GitLens to see inline blame annotations. It’ll tell you which commit last touched that line, who authored it, and when. It’s an efficient way to track accountability—just don’t use it for shaming your past self too hard.
GitHub Integration
Visual Studio Code provides native support for GitHub, GitLab, and Bitbucket workflows. For example, you can:
- Clone a repository by clicking the Source Control icon, then the triple-dot menu (
…), and selectingClone Repository. Paste in the remote URL, pick a local folder, and you’re off. - Create pull requests using the GitHub Pull Requests extension (or a similar extension for GitLab or Bitbucket). This gives you a specialized view in Visual Studio Code to manage pull requests, add comments, and review code without leaving your editor.
- Push to private or public repos by using the same
PushorPublish Branchfeatures in the Source Control menu.
If you want to integrate more deeply, the official GitHub extension suite lets you sign in to GitHub and manage issues, pull requests, and more, all from within Visual Studio Code.
Another Option
Alternatively, I also really like Github Desktop.